
Mold maintenance plays a vital role in ensuring production quality and operational efficiency. Over time, injection molds can develop worn cavities, which disrupt the precision of molded parts and lead to defects. You may notice irregularities in part dimensions or surface finishes, both of which can hinder your production goals. Addressing these issues promptly with effective mold repair not only restores functionality but also extends the life of your molds. By prioritizing maintenance, you can avoid costly replacements and maintain consistent output.
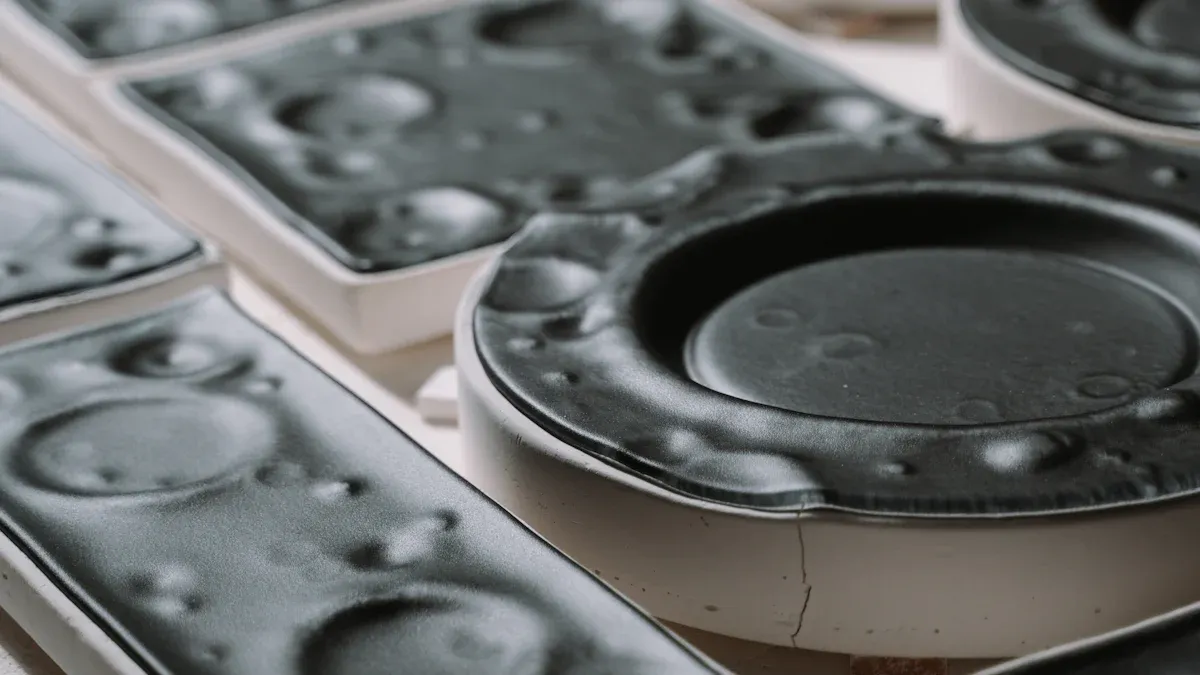
Worn cavities refer to areas within an injection mold that have experienced material loss or damage over time. This can occur due to repeated use, exposure to high pressures, or abrasive materials. In industry terms, a cavity is the part of the mold where the molten plastic is shaped into the desired product. When this cavity becomes worn, it can no longer produce parts with the same precision or quality. The wear often results from erosion, abrasion, or even chemical reactions during the molding process. Addressing these issues promptly ensures that your molds continue to perform efficiently.
Detecting worn cavities early can save you time and money. Here are some common indicators to look for:
These steps help you pinpoint wear points and assess the extent of damage in your injection molds.
Worn cavities can significantly affect your plastic injection molding operations. They lead to defects in the molded parts, such as uneven surfaces, incorrect dimensions, or poor finishes. These issues can disrupt production and result in wasted materials. Additionally, worn cavities reduce the efficiency of your molds, increasing cycle times and energy consumption. Over time, this can escalate costs and delay project timelines. By addressing worn cavities promptly, you can maintain consistent product quality and avoid unnecessary expenses.
Material wear is one of the leading causes of cavity damage in injection molds. When abrasive materials, such as glass-filled polymers, are used, they erode the mold surface faster than standard thermoplastics. This wear reduces the mold’s lifespan significantly. For example:
- A manufacturing facility using glass-filled polymers reported an average mold lifespan of 600,000 cycles, compared to 1 million cycles for standard thermoplastics.
- Reducing injection pressure by 10% and moderating temperature controls increased mold lifespan by 15%, reaching an average of 1.15 million cycles.
You can minimize mold wear by selecting less abrasive materials or optimizing injection parameters. These adjustments reduce stress on the mold and extend its operational life.
High-pressure and high-temperature conditions during molding operations accelerate wear on cavities. These extreme conditions cause stress on the mold, leading to cracks, deformation, or surface damage. Injection parameters like pressure, temperature, and speed play a critical role in determining mold durability.
Moderating these parameters can help you reduce wear and improve mold performance. For instance, lowering injection pressure and maintaining consistent temperature controls can prevent excessive strain on the mold. Proper storage conditions also protect molds from environmental factors that contribute to wear.
Neglecting regular maintenance leads to faster mold wear. Improper handling or incorrect setup can cause physical damage, shortening the mold’s lifespan. Additionally, the type and frequency of mold release agents used can affect the mold surface, further contributing to wear.
To prevent these issues, you should implement a maintenance schedule that includes cleaning, inspection, and proper storage. Training staff on correct mold handling techniques also reduces the risk of damage. These practices ensure your molds remain in good condition and perform efficiently over time.
Using substandard materials or coatings in your injection molds can significantly accelerate wear and tear. These materials often lack the durability and resistance needed to withstand the high pressures and temperatures of molding operations. As a result, they degrade quickly, leaving your molds vulnerable to damage.
When you choose low-quality coatings, they may fail to provide adequate protection against abrasion or corrosion. For example, a poorly applied or inferior coating can chip or peel off during use. This exposes the mold surface to direct contact with abrasive materials, leading to faster erosion. Over time, this compromises the mold’s ability to produce precise and high-quality parts.
Tip: Always verify the quality of materials and coatings before applying them to your molds. Investing in premium options may cost more upfront but saves you money in the long run by reducing repair and replacement needs.
Here are some common issues caused by substandard materials or coatings:
- Increased Surface Wear: Inferior materials cannot resist the constant friction and pressure during molding cycles.
- Corrosion Damage: Low-quality coatings may fail to protect against chemical reactions, especially when working with corrosive plastics.
- Shortened Mold Lifespan: Frequent repairs or replacements become necessary, disrupting production schedules.
To avoid these problems, prioritize high-quality materials and coatings designed for your specific molding applications. Look for options with proven durability, such as hardened steel or advanced PVD (Physical Vapor Deposition) coatings. These materials provide better resistance to wear and corrosion, ensuring your molds perform efficiently for longer periods. By making informed choices, you can protect your molds and maintain consistent production quality.

Before repairing worn cavities, you need to assess the extent of the damage accurately. This step ensures that you choose the right repair methods and avoid unnecessary costs. Several diagnostic tools and techniques can help you evaluate mold damage effectively.
| Diagnostic Tool/Technique | Description |
|---|---|
| Air Sampling | Measures mold spores in the air using calibrated pumps and cassettes for laboratory analysis. |
| Wall Cavity Sampling | Tests hidden areas behind walls for microbial activity by drilling and sampling air from cavities. |
| Tape Slide Sampling | Collects samples of spores from surfaces using adhesive slides for identification in a lab. |
| Moisture Inspection (IR Cameras) | Detects moisture conditions that promote mold growth using thermal imaging technology. |
Moisture inspection using infrared cameras is particularly useful. These cameras capture thermal images that reveal cooler areas where moisture is present. Early detection of such conditions helps you address mold damage before it worsens.
Tip: Regular inspections using these tools can prevent minor damage from escalating into costly repairs.
Having the right tools and materials is essential for effective mold repair. High-quality equipment ensures precision and durability, while reliable materials improve mold performance after repairs.
| Supplier/Manufacturer | Product Description | Effectiveness Verification |
|---|---|---|
| Dynamic International | SXKH spotting press | Ergonomic mold matching |
| Gesswein | UltraMax mini ultrasonic polishing system | Faster polishing of intricate details |
| Slide Products, Inc. | X-EMPT mold cleaner | Complies with air quality regulations |
| iD Additives, Inc. | Eco-Pro 360 rust removal products | Newest addition for rust prevention |
| Cold Jet, LLC | PCS 60 dry ice blaster | Features patented particle control system |
| Alliance Specialties and Laser Sales | ID1-Fiber laser welding machine | Hands-on operation for precision welding |
For example, the UltraMax mini ultrasonic polishing system from Gesswein allows you to polish intricate mold details quickly and efficiently. Similarly, the ID1-Fiber laser welding machine offers precision welding, making it ideal for repairing small cavities.
Note: Investing in high-quality tools and materials reduces repair time and ensures long-lasting solutions for your molds.
Several repair methods can restore worn cavities and improve mold performance. Each method addresses specific types of damage and offers unique benefits.
Welding is one of the most effective repair methods for restoring mold cavities. Techniques like mold overlay welding (MOW) and ultra-high power laser metal active gas (MAG) composite welding repair molds by restoring their original size and shape. These methods extend mold lifespan and reduce production costs. Research shows that welding repairs can save 25%-75% of costs while increasing mold lifespan by 30%-300%.
Polishing removes surface imperfections caused by wear or abrasion. Ultrasonic polishing systems, such as the UltraMax mini, are ideal for intricate mold details. Polishing improves mold performance by ensuring smooth surfaces, which enhance the quality of molded parts.
Applying protective coatings prevents future damage and extends mold life. Advanced coatings like Physical Vapor Deposition (PVD) resist abrasion and corrosion, making them suitable for high-pressure and high-temperature conditions. Coating also reduces the need for frequent repairs, saving you time and money.
Tip: Choose repair methods based on the type and extent of damage to achieve the best results.
Testing and verifying repairs is a critical step in ensuring that your injection molds are ready for production. This process confirms that the repairs have restored the mold to its original functionality and guarantees the quality of the molded parts. Skipping this step can lead to defects, wasted materials, and additional costs.
To validate the reliability of mold repairs, you should follow industry-recognized standards and protocols. These ensure that the repaired mold meets performance and safety requirements. Here are some essential testing methods:
These protocols help you identify potential problems early and ensure that your mold operates efficiently after repairs.
After completing the repairs, you should take a systematic approach to testing. Start by visually inspecting the mold for any signs of wear or damage. Look closely at the repaired areas to ensure they align with the original design specifications. Use tools like calipers or micrometers to measure critical dimensions and verify accuracy.
Next, test the mold under controlled conditions. Run a small batch of production cycles to evaluate its performance. Check the molded parts for defects such as uneven surfaces, incorrect dimensions, or poor finishes. If you notice any issues, revisit the repair process to address them.
Tip: Keep detailed records of your testing results. This documentation helps you track the mold's performance over time and identify patterns that may indicate recurring problems.
Verification ensures that the repaired mold meets your production requirements. It also helps you avoid costly downtime and material waste. By thoroughly testing and verifying repairs, you can maintain consistent product quality and extend the life of your molds.
For example, a manufacturing facility that implemented rigorous testing protocols reported a 20% reduction in defective parts and a 15% increase in mold lifespan. These results highlight the value of investing time and effort into the testing process.
Using the right tools can make the testing process more efficient and accurate. Consider incorporating the following into your workflow:
| Tool/Equipment | Purpose |
|---|---|
| Calipers/Micrometers | Measure dimensions with precision |
| Thermal Imaging Cameras | Detect temperature inconsistencies |
| Surface Profilometers | Assess surface roughness and texture |
| Mold Flow Analysis Software | Simulate mold performance under real conditions |
These tools provide valuable insights into the repaired mold's condition and help you make informed decisions about its readiness for production.
Note: Regular testing and verification should be part of your mold maintenance routine. This proactive approach minimizes the risk of unexpected failures and ensures long-term reliability.
When deciding between repair and replacement, you need to evaluate several factors. The extent of damage to the mold plays a significant role. Minor wear, such as surface scratches or small cracks, can often be fixed through repair. However, severe damage, like deep cavities or structural deformities, may require replacement.
The age of the mold also matters. Older molds may have undergone multiple repairs, reducing their overall efficiency. If the mold struggles to meet the demands of high-volume production, replacement might be the better option. Additionally, consider the material used in the mold. High-quality materials are more repairable and durable, while substandard ones may not withstand repeated repairs.
Cost is a critical factor in your decision-making process. Repairing a mold is usually more affordable than replacing it. For example, welding or polishing can restore functionality at a fraction of the cost of a new mold. However, frequent repairs can add up over time. If you find yourself repairing the same mold repeatedly, replacement may save you money in the long run.
Replacement costs are higher upfront but offer long-term benefits. A new mold ensures better performance and reliability, especially for injection molding services requiring high-volume production. You should weigh the immediate savings of repair against the potential downtime and inefficiencies caused by an aging mold.
Replacement becomes necessary when repairs no longer restore the mold's functionality. If the mold fails to produce parts that meet quality standards, it may be time for a new one. Similarly, if the mold cannot handle the pressures of high-volume production, replacement is the only viable solution.
You should also consider replacement if the mold's design is outdated. Modern injection molding services often require advanced molds with improved durability and efficiency. Investing in a new mold can enhance your production capabilities and reduce long-term costs.
Tip: Regularly assess your molds to determine whether repair or replacement is the best option. This proactive approach ensures consistent performance and minimizes disruptions.
Regular inspection and cleaning are essential for effective mold maintenance. You should establish a routine inspection schedule to identify wear early and prevent costly repairs. Daily visual inspections help you spot surface damage or irregularities. Weekly analytical sampling provides deeper insights into mold performance, while monthly equipment assessments evaluate wear risks using tools like FMEA rankings.
| Inspection Frequency | Activity Description | Evaluation Method |
|---|---|---|
| Daily | Visual inspections | Pass/Fail |
| Weekly | Analytical sampling | Statistical analysis |
| Monthly | Equipment assessments | FMEA risk rankings |
| Quarterly | Cleaning performance review | Cpk analysis |
| Semi-Annual | Trend evaluations | Statistical tools |
| Annual | Holistic process review | Quality metrics evaluation |
Cleaning molds regularly prevents debris buildup, which can accelerate wear. Use mold cleaners that comply with air quality regulations to ensure safe and effective cleaning. Keeping a detailed work log of maintenance activities helps you track issues and optimize your cleaning schedule.
Tip: Perform inspections and cleaning based on the material of your molds. Softer materials may require more frequent care to maintain precision.
High-quality materials and coatings significantly enhance mold longevity. Premium coatings like Armoloy XADC® and diamond-like carbon provide exceptional resistance to wear and corrosion. These coatings maintain a uniform finish, ensuring tight tolerances for molded components. For example, Dursan-coated stainless steel molds showed no signs of wear after four months of daily use, outperforming nickel-coated molds that corroded within three weeks.
When selecting materials, prioritize options like hardened steel or chrome-based coatings. These materials withstand high-pressure and high-temperature conditions, reducing the risk of erosion. Investing in durable materials may cost more upfront but saves you money by minimizing repairs and replacements.
Note: High-quality coatings not only protect molds but also improve part quality, ensuring consistent production results.
Optimized mold design plays a crucial role in reducing wear and extending mold life. You should focus on designs that distribute stress evenly across the mold surface. Engineering simulations demonstrate that optimized designs enhance durability and minimize wear in high-pressure environments.
| Study Title | Authors | Journal | Year | Findings |
|---|---|---|---|---|
| Optimum design of a composite drone component using slime mold algorithm | M. Akhondizadeh et al. | Int. J. Eng. Trans. A Basics | 2023 | Demonstrates optimized designs enhance durability and reduce wear in composite materials. |
| A new procedure of impact wear evaluation of mill liner | M. Akhondizadeh et al. | Int. J. Eng. Trans. A Basics | 2015 | Evaluates wear in mill liners, supporting the importance of optimized designs in reducing wear. |
Modern mold designs incorporate advanced features like reinforced cavities and improved cooling systems. These features reduce thermal stress and prevent deformation during production. By adopting innovative designs, you can ensure your molds perform efficiently under demanding conditions.
Tip: Collaborate with design engineers to create molds tailored to your specific production needs. This proactive approach reduces wear and enhances mold durability.
Proper mold handling by your staff is essential to prevent unnecessary wear and extend the life of your molds. Training your team ensures they understand the best practices for handling, cleaning, and storing molds effectively. This not only reduces damage but also improves production efficiency.
Safe Handling Techniques
Teach your staff how to handle molds carefully to avoid physical damage. For example, always use lifting equipment like hoists or cranes when moving heavy molds. Emphasize the importance of avoiding direct contact with mold surfaces to prevent scratches or dents.
Proper Cleaning Procedures
Train your team to clean molds using approved tools and products. Abrasive materials or harsh chemicals can damage mold surfaces. Instead, use soft brushes and mold-safe cleaners. Demonstrate how to remove debris and residue without harming the mold.
Storage Best Practices
Show your staff how to store molds in a clean, dry environment. Moisture and dust can lead to corrosion or contamination. Use protective covers and ensure molds are stored in a temperature-controlled area to maintain their condition.
Inspection and Reporting
Encourage your team to inspect molds regularly for signs of wear or damage. Teach them how to document issues and report them promptly. Early detection of problems can save you time and money on repairs.
Tip: Create a checklist for your staff to follow during mold handling and maintenance. This ensures consistency and reduces the risk of errors.
Well-trained staff can handle molds with care, reducing the likelihood of damage. They can also identify potential issues early, preventing costly repairs or replacements. By investing in training, you improve mold performance and ensure consistent product quality.
Identifying and repairing worn cavities in injection molds ensures consistent product quality and reduces long-term costs. Proactive maintenance plays a key role in extending mold life and preventing expensive repairs or replacements. Delaying maintenance can lead to significant financial consequences, as shown below:
| Statistic Description | Value |
|---|---|
| Cost of deferred maintenance | Every $1 deferred in maintenance costs $4 of capital renewal needs. |
| Future expenses from deferred work | Deferred maintenance can lead to expenses 15 times the repair cost. |
| Compounding rate of deferred costs | Maintenance costs compound at a rate of 7% per year. |
| Increase in future costs | Delays can increase future costs by as much as 600%. |
By implementing regular inspections, using high-quality materials, and training your team, you can avoid these pitfalls. Take action today to protect your molds and maintain efficient production. If needed, consult professionals to ensure the best results.
You may notice defects like uneven surfaces, incorrect dimensions, or poor finishes in molded parts. Increased cycle times and energy consumption also indicate wear. Regular inspections help you detect these issues early.
Inspect molds daily for visible damage and clean them regularly. Perform detailed inspections weekly or monthly, depending on production volume. Consistent checks prevent minor wear from escalating into costly repairs.
Yes, minor repairs like polishing or cleaning can be done in-house with proper tools. However, complex issues like welding or coating require professional expertise to ensure precision and durability.
Hardened steel and advanced coatings like PVD or diamond-like carbon offer excellent resistance to wear and corrosion. These materials withstand high-pressure and high-temperature conditions, ensuring longer mold life.
Evaluate the extent of damage, mold age, and repair costs. If repairs fail to restore functionality or the mold struggles with production demands, replacement becomes necessary. Regular assessments help you make informed decisions.
Tip: Keep a maintenance log to track mold performance and identify recurring issues early.

RM1223, 12F, No.1, Fuji Bldg, No. 6018 Longgang RD. , Longgang Dist., Shenzhen,China.


Tel: 0086-755-89618186

Contact: Paul Hu 0086-18675501028


 LEAVE MESSAGE